


How to Replace Lead Water Pipes: A Complete Guide
How to Identify Lead Water Pipes

Lead pipework poses genuine health risks, which is why identifying whether your property has it is the critical first step before you replace lead water pipes. Most homes built before the 1970s in older areas contain lead pipes, though the only way to know for certain is to inspect them directly.
Lead pipes have distinctive visual characteristics. They're soft, dense, and dull grey in colour. When you scrape the surface gently with a coin or screwdriver, exposed lead shows a bright, shiny silver underneath. This is the most reliable field test you can perform yourself.
Visual signs of lead pipework
Look for the incoming water pipewhere it enters your property, typically in the basement, under the kitchen sink, or where the mains connection meets the external wall. Lead pipes feel noticeably heavier than copper or plastic equivalents and bend easily under pressure.
Check the pipe's surface texture. Lead pipework often shows a dull, slightly weathered appearance. You may also notice solder joints that look grainy or rough, quite different from the clean, smooth joints on copper pipes.
Exposed pipework in older properties is easier to inspect than buried sections. If your home has a Victorian or Edwardian structure, examine the internal stop tap, the valve controlling water supply to your property.
Testing and verification methods
The scrape test works reliably for exposed pipes. Use a clean coin or small screwdriver to scratch a small area of the pipe surface. If the scratch reveals bright, shiny metal underneath the grey exterior, lead is present. Copper shows a distinctive reddish tone when scratched.
For definitive confirmation, you can request a professional water quality test. Your water company can analyse samples for lead content.
A qualified plumber can also survey your pipework visually and advise on the extent of lead present. Many will photograph the pipes and provide a written assessment, which is useful when planning replacement work or applying for grants.
Who Is Responsible for Lead Water Pipes
Understanding responsibility is essential before you start replacement work. The division between water company and homeowner responsibility is clearly defined, though it can feel confusing in practice.
Water company responsibility
Your water company owns and maintains the mains water pipe up to the property boundary. This is called the public water main. If the lead pipesection runs from the street to your property boundary, the water company is responsible for replacing it at no cost to you.
However, water companies don't automatically replace lead pipes. You must request it. Contact your supplier and ask whether lead pipework affects your property. They can tell you whether the public section contains lead and whether replacement schemes are available in your area.
The water company's responsibility ends at the property boundary. Once the pipe crosses onto your land, it becomes your responsibility entirely.
Homeowner and tenant responsibilities
Everything from the property boundary inward is your responsibility. This includes the service pipe running from the boundary to your home, all internal pipework, and the internal stop tap.
If you're a tenant, check your tenancy agreement. Most landlords are responsible for maintaining water supply pipes, as these are structural elements of the property.
Landlords must ensure water supply pipes are safe and functional. If a tenant reports a lead pipe issue, the landlord is legally responsible for addressing it. Ignoring this can breach housing standards and create liability.
Owner-occupiers have full responsibility for all pipework on their property. You must fund replacement yourself, though grants may be available depending on your location and circumstances.
Health Risks and Why Replacement Matters
Lead in drinking water poses real health concerns, particularly for young children and pregnant women. Lead accumulates in the body over time and can affect cognitive development, behaviour, and learning in children.
Gosforth Handyman
The risk depends on several factors: how old the pipes are, water pH levels, how long water sits in the pipes before use, and whether you're consuming cold tap water regularly.
Adults face risks including increased blood pressure, kidney damage, and reproductive problems with prolonged exposure (Lead: toxicological overview). The safe level is zero, there is no safe threshold for lead consumption.
To replace lead water pipes eliminates this risk entirely. Once lead pipes are removed, lead cannot leach into your water supply.
Lead Water Pipe Replacement Cost Explained
Cost varies significantly based on several factors. There's no single figure that applies to all properties, which is why getting a quote from a qualified contractor is essential.
Cost drivers and what affects your quote
The length of pipework requiring replacement is the primary cost driver. A short service pipe from the boundary to your home costs less than replacing internal pipework throughout the property.
Access and disruption influence cost. Properties with gardens, driveways, or landscaping requiring careful reinstatement cost more than straightforward replacements. Urban terraced properties may have restricted access, which increases complexity.
The pipe material chosen for replacement affects price. Plastic pipes (typically polyethylene) are the most economical option and are now standard for water supply pipes. Copper costs more but has a longer lifespan.
Whether the work is straightforward or requires trenchless technology (moling) changes the cost significantly. Traditional excavation is cheaper but more disruptive.
Grant assistance and support schemes
Some water companies offer grant schemes to assist with lead pipe replacement. These vary by region and supplier. Contact your water company directly to ask whether grants are available for your property.
The schemes typically cover either the full replacement cost or a percentage contribution. Some require you to meet eligibility criteria, such as income thresholds or property age. Others are available to all customers.
Local council environmental health teams may also have information about support schemes or funding. Some councils in areas with widespread lead pipework have dedicated programmes to assist residents.
Document all quotes and correspondence. If you're eligible for a grant, the water company will usually require quotes before approving assistance.
How Long Does Lead Pipe Replacement Take
The duration depends on the scope of work and the method used. A straightforward replacement of the service pipe from boundary to home typically takes one to three days.
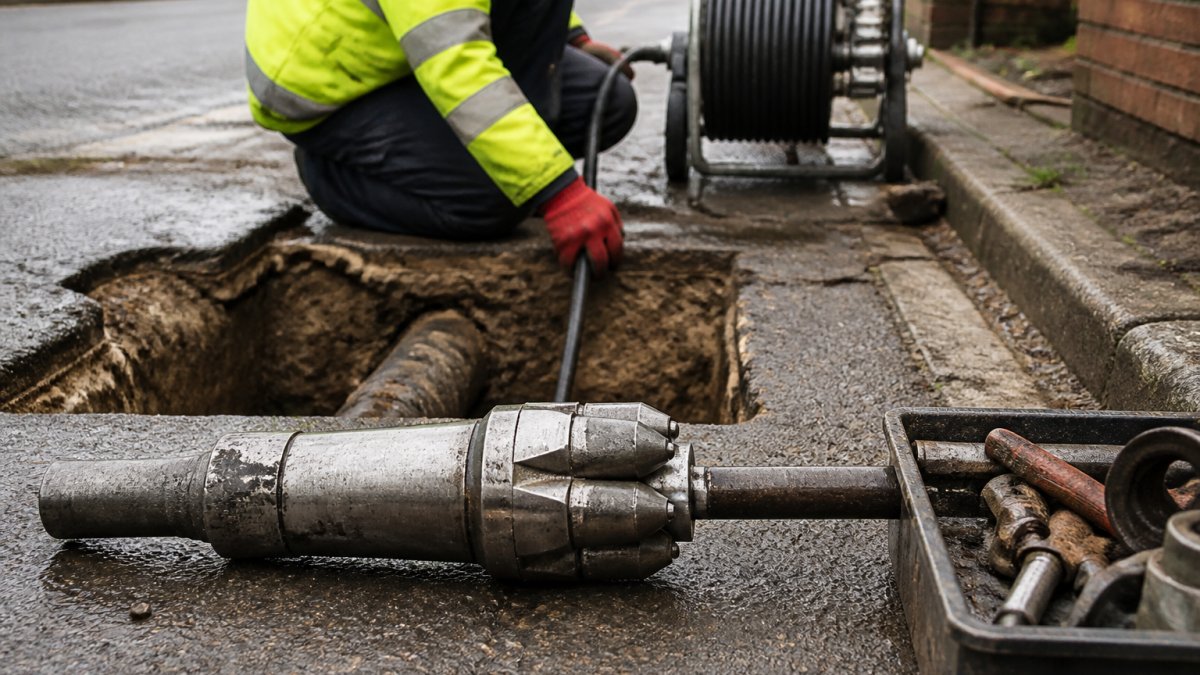
Trenchless moling (the method External Moling Services Ltd specialises in) can often be completed faster than traditional excavation because there's no digging required.
You'll be without mains water during the active replacement work. Your contractor should schedule the work to minimise disruption.
Plan for additional time if your property requires access preparation. If a driveway or garden needs temporary removal to reach the pipes, this adds days to the project.
The Step-by-Step Replacement Process
Replacing lead water pipes follows a logical sequence. Understanding each stage helps you plan and know what to expect.
Step 1: Inspection and survey
A qualified plumber or engineer visits your property to assess the extent of lead pipework and plan the replacement. They'll identify where the pipes run, how deep they're buried, and what access is needed.
The surveyor photographs the pipes and notes any complications, shared services with neighbours, difficult terrain, or obstacles. They measure the length of pipe requiring replacement and assess whether traditional excavation or trenchless moling is feasible.
This inspection produces a written quote and a method statement explaining how the work will be done. It's your chance to ask questions and understand what's involved. Reputable contractors provide detailed surveys before committing to any work.
Step 2: Planning and access preparation
Once you've accepted the quote, the contractor plans the exact work schedule and prepares access. If digging is required, temporary removal of driveways, patios, or garden features may be necessary.
For trenchless moling, the contractor identifies the entry and exit points for the moling equipment. This method requires less access preparation but still needs clear routes for machinery. The contractor marks out the work area and arranges any temporary fencing or protection needed.
You'll receive a confirmed start date and an estimate of how long the work will take. The contractor should explain what to expect during the work and how long you'll be without water. Arrange alternative water supply (bottled water or temporary supply) if needed.
Step 3: Pipe removal and installation
The old lead pipe is removed carefully. If traditional excavation is used, the contractor digs a trench along the pipe's route, carefully removes the pipe, and installs the new one (typically plastic or copper).
With trenchless moling, the old pipe is pushed or pulled out through the ground without digging. The new pipe is installed in the same path. This method preserves your garden and driveway but requires specialist equipment and training.
The new pipe is connected to the mains water supply at the property boundary and to your internal plumbing at the property entry point. All joints are sealed and tested for leaks as the work progresses.
Step 4: Testing and reconnection
Once installation is complete, the contractor tests the system under pressure to confirm there are no leaks. They flush the new pipes to remove any debris or sediment from the installation process.
The internal stop tap is reconnected and tested. Water supply is restored gradually, starting with low pressure to avoid water hammer (sudden pressure spikes that can damage fittings).
The contractor provides you with a completion certificate confirming the work is done and the pipes meet water quality standards. Keep this for your records, it's useful if you sell the property or need to prove the work was completed professionally.
Reducing Lead Exposure While You Wait for Replacement
If you've identified lead pipes but replacement isn't scheduled immediately, you can reduce exposure in the meantime.
Run water from the cold tap for 30 seconds before using it for drinking or cooking. This flushes out water that's been sitting in the lead pipes overnight or for several hours.
Use cold tap water only for drinking and cooking. Hot water leaches lead more readily from pipes.
Install a point-of-use water filter certified to reduce lead. Filters must be specifically designed for lead removal, standard filters won't remove it. Change filters regularly according to the manufacturer's instructions.
These measures reduce but don't eliminate exposure. Replacement is the only permanent solution.
Conclusion
Lead water pipes are a genuine health concern, but identifying and replacing them is straightforward with professional support. The process involves inspection, planning, removal, installation, and testing, typically completed within a week for most properties.
At External Moling Services Ltd, we specialise in replacing lead water pipes using trenchless moling technology, which minimises disruption to your property. Our fully qualified engineers provide detailed surveys, transparent quotes, and a 10-year labour guarantee on all replacements. Get your free quote today and take the first step toward safe, lead-free water supply.
Frequently Asked Questions
How can I tell if my water supply pipe is made of lead?
Lead pipes have a distinctive silver-grey surface that darkens with age. If you scrape the outer layer gently with a coin or knife, you'll see bright silver underneath. Lead pipes are also soft enough to dent with light pressure. Check where the water supply enters your property at the boundary or under the kitchen sink. If you're unsure, a qualified plumber can test the pipe material and confirm whether replacement is needed.
Who is responsible for replacing lead water pipes in the UK?
The water company is responsible for replacing the service pipe from the mains water supply up to the property boundary. You, as the homeowner, are responsible for the internal supply pipe from the boundary into your property. If you rent, your landlord is responsible for the internal pipework. Contact your water company first to understand their responsibilities and any replacement schemes they offer.
How much does lead water pipe replacement cost?
Costs vary significantly depending on pipe length, property access, ground conditions, and whether trenchless moling technology is used. A straightforward replacement may cost differently than one requiring excavation or reinstatement work. Many water companies offer grant assistance or replacement schemes that can reduce your costs substantially. Get a free quote from a qualified contractor to understand the specific costs for your property and situation.
How long does it take to replace a lead water pipe?
A typical replacement takes between one and three days, depending on pipe length, access difficulties, and ground conditions. Modern trenchless methods can often complete the work faster than traditional excavation. Your contractor will provide a timeline during the survey phase.


Comments